The Wooden Stage
The shape of the cabinet is inspired by the Avalon Opus Ceramique. The dimensions of the Milestones are given by the following pictures. These pictures have been derived from drawings made by Tony Gee.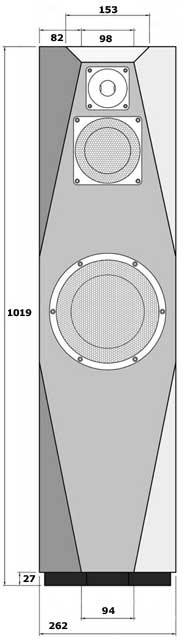

The enclosures have been built at Gydotrons’ place, in Belgium. He has all the necessary equipment and skills for professional wood working. He has quite some experience building these enclosures, so he builds the design without the need for a drawing. That means that our enclosures deviate from the previous drawing, and include all kind of on-the-spot improvements.
The importance of material type, thickness and bracing is explained by an article of H. Hausdorf from Visaton. See this German web-page to hear the difference between different materials and bracing, or this Dutch web page with many measurements. (one can use babblefish for translation of web pages from Dutch/German to English).
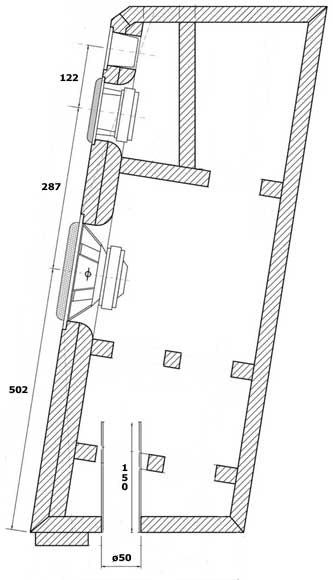
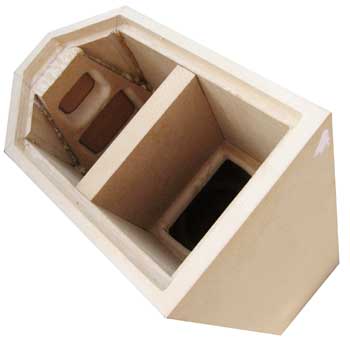
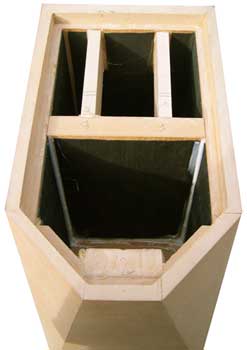
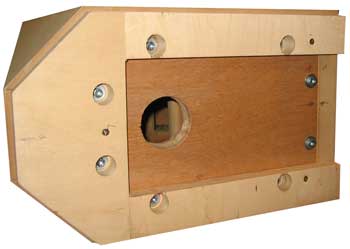
The Milestones and Soup enclosures are built using 30mm high quality MDF. The front side consists of 2 glued pieces of MDF, resulting in 60mm in total. Internal bracing is applied to reduce resonances as much as possible. Additionally bitumen is glued to the internal surfaces. The midrange unit and tweeter have their own internal enclosure. Including the units, and excluding the filter, the total weight is about 55 kg. The volume of the internal chambers are about 45 liters for the woofer, and 6 liters for the midrange, as calculated on the Acoustical Stage page.
The background for the tilted edges can be found in the article published "Direct Radiating Loudspeaker Enclosures," in the JAES (January 1969), Vol.17 No.1, pp.22-29 by H.F. Olson. Edges of a cabinet diffract sound, affecting the performance as shown in the following figure.
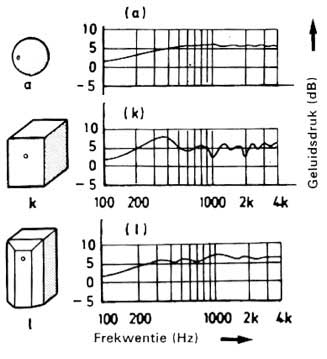
An ideal shape would be a sphere, but this is not practical and doesn't fit in most decorations. A square box is pretty bad. A box with curved sides and corners approaches the response of a sphere. The effects of diffraction has also been studied by Siegfried Linkwitz, questioning the effect.
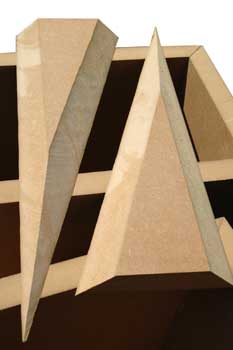
The edges have been made by separate wooden diagonal pieces (challenging sawing!), which because of diagonal connections and orthogonal forces, spread resonances over a wider frequency range. Many people seem to doubt this construction with separate pieces, but knocking on the resulting construction shows that our solution is at least as solid as genuine Avalons, and at some places sound even more solid.
The bottom plate is removable, to be able to add/change the filter or vent later in the project.
The speaker is veneered with maple veneer. First the speaker and the veneer are glued with fast drying wood glue. When the glue has dried, the veneer is applied with a moderate hot iron. The procedure is described at the Dutch website of the Arnehmse Fijnhouthandel. Houtvademecuum is a nice Dutch book discussing different types of wood and veneer colors.
Then the speaker unit holes are being made. The website of Thiel specifies the dimensions for the C^2 12, C^2 79 and C^2 220-T6. Subsequently, a brace has been added (and in a later stage removed!) that supports the back of the woofer, so it tightly connected to all sides of the cabinet, and resonances are spread to all directions.
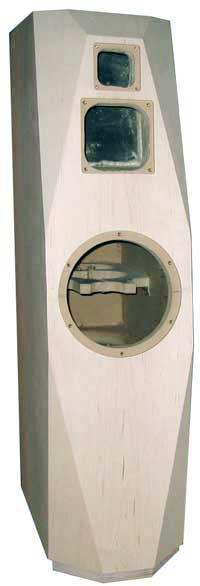
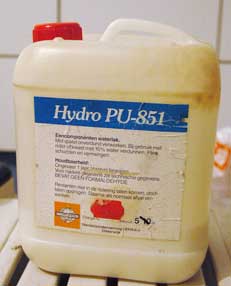
We've decided to use lacquer for finishing. The veneer on the corners is very fragile, so protection is needed. We wanted to preserve the natural wooden appearance of the speakers as much as possible, so we have selected non-shiny lacquer (Hydro PU-851).
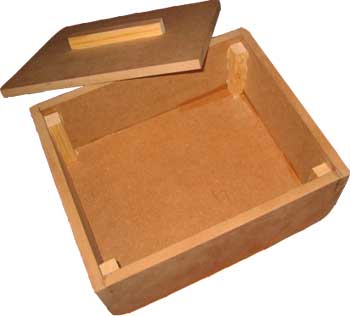
As the filter was an unknown part of the design, we've decided to initially keep the filter outside the enclosure, and put it inside the enclosure at a later stage. To prevent electrical components from hanging outside, and to enable easy swapping of filters, Luc has made a small filter box, that can be wired to the speaker. In the final design, the filter will be mounted inside the speaker enclosure.
For more details about the speaker creation, and to see more details, have a look at the construction photo tour. I've also included a slide show to show the final results.
next ->